In the course of a photography workshop which was held by Alan Ross at Jobo artisan in September 2021, the class visited the Zeche Zollern in Dortmund. It was my second visit to that mine; the previous visit resulted in the photos in the gallery Zeche Zollern. The weather on that day was fine and the sun was not as bright as it was during my first trip.
The class members used cameras that ranged from 4×5 view cameras to 6×7 SLR. I brought my 6×9 Plaubel Peco Junior view camera. To ease the development of the films from the participants, we all used Kodak Tmax 100 film. As I had no experience with this film, I chose to expose it at a sensitivity of 80 ISO. This gallery shows the scanned 18×24 prints which I made from the negatives of the two films. Some negatives turned out thin, but they were all printable. Mostly, I had placed the deeper shadows at zone III and the dark parts show enough details in the negatives.
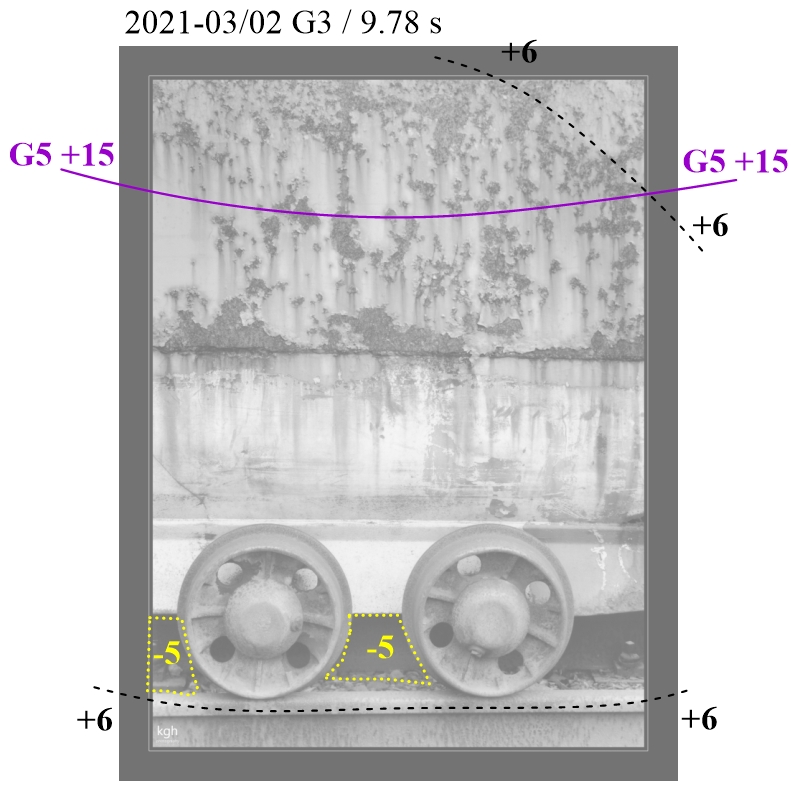
The first image Trackway was meant to be somewhat wider. However, with the image projected to the easel, I saw a small white van being parked in the background which I had not noticed on the ground glass. This was too distracting and thus I cropped the image to the shown extent.
The second image illustrates the nice pattern of rust spots on typical of some of the lorry cars. Basic exposure was 9.78 s at grade 3.

The numbers in the print record shown on the right give the dodging and burning times in fractions of 1/12 of an f-stop (e.g., 6 means half an f-stop). The yellow parts between the wheels were dodged, the sections with black numbers were burned with grade 3 and the top part received a burn with grade 5.
The car next to it was also attractive and good for the third image with the rusted hole in the lower left corner, the three round rust spots, and the scratches. It was laborious to get the bulge at the top of the car and the weld seam at the bottom to frame the image without showing a part of the sky, which would have caused too much flare as the sun was shining obliquely from behind the car. The negative is soft and the basic exposure was 39.8 s at grade 4. The left edge and the rusted hole were dodged a little; the very top left corner received a strong burning with grade 0, and the right side up to the scratch another burn with grade 3.
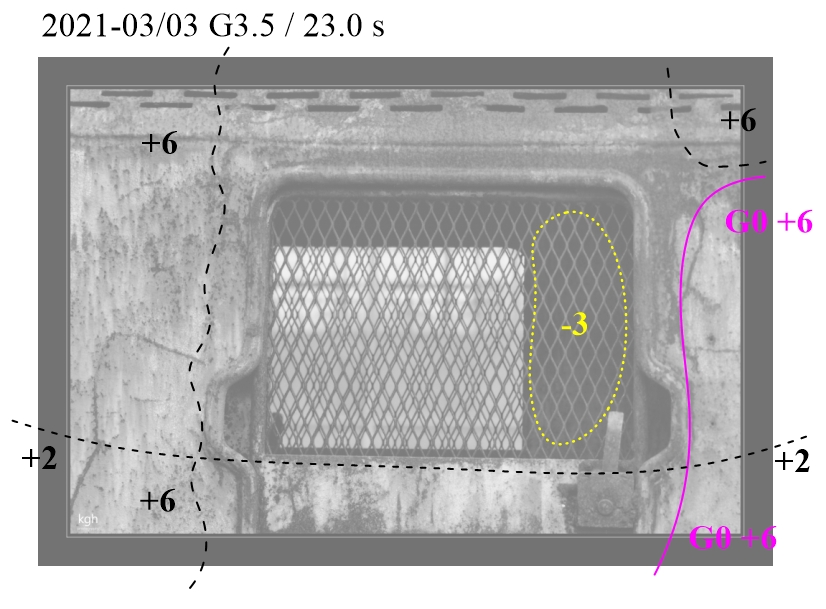
The next car was hard to pass up. The window grill asked for a black and white photo, which is the fourth in the gallery. Again, the sky had to be avoided but the nice pattern of the horizontal rectangular holes had to be included. The local contrast within the window was quite high; however, it worked out to not burn out the highlights and keep some structure of the back wall of the car’s interior.

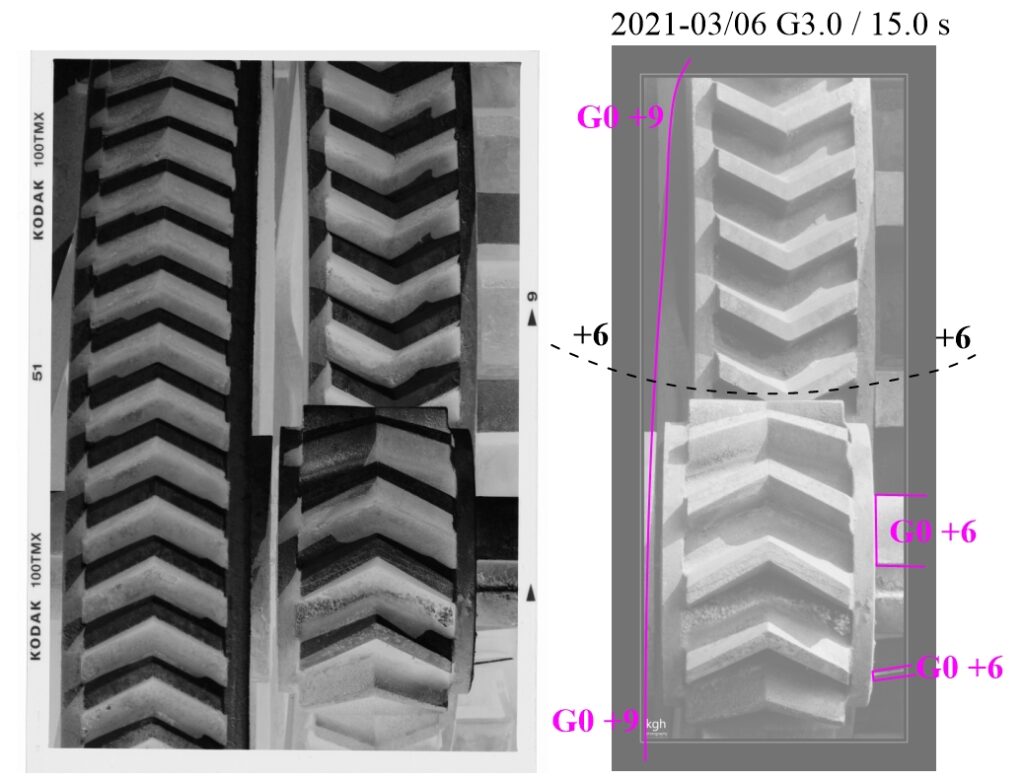
During my first visit, I had noticed some giant gear wheels and had already taken a photo of one of them. Next to the one from the first visit were the skew gear wheels of the fifth image in the gallery. The negative (see below) also includes another wheel to the left which was part of my original design. But in the lab, it turned out that the depth of field was not quite large enough to cover these somewhat closer wheels. Cropping helped to turn this into an interesting view, and the full frame will be handled during the next visit. Next to the negative, the print record is shown with the basic exposure given at the top and the burning grades and times.

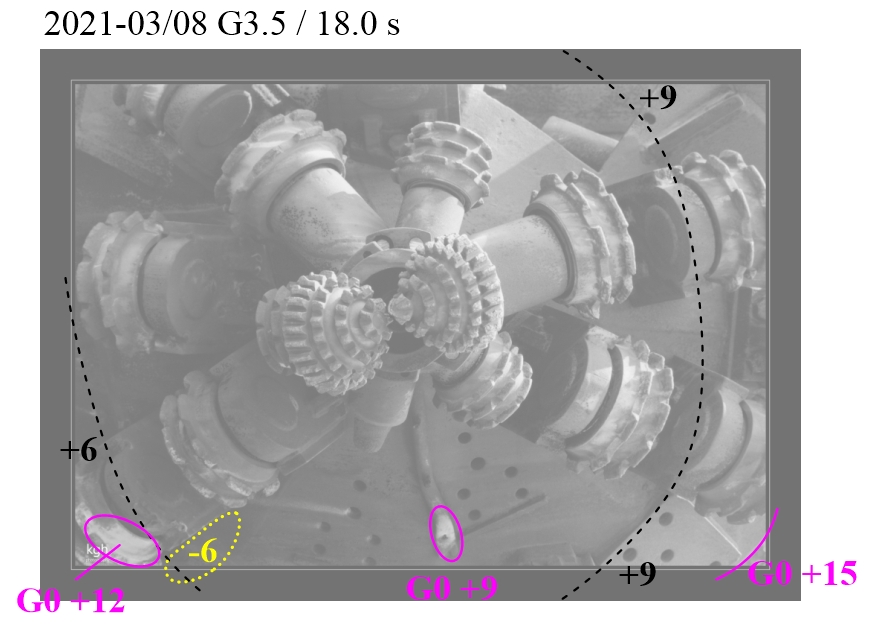
Not far from the gear wheels, an impressive drill head offered an attractive perspective for the sixth image. The frontal view draws the eye to the two drill bits in the center of the head, which I place a little off center in the image to generate more dynamic.

The next three images are from the inside of the great machine hall of Zeche Zollern. Frame number seven shows two oilers, some screws, and a nice specular reflection of the sun which came through the windows and reflected from the iron casing. The small glass oilers of such old gear are always attractive as they look rather fragile next to giant wheels, cylinders, and connecting rods. To the basic exposure was 12.4 s at grade 2, the top and bottom edges were burned for 3/12 of an f-stop, and the left part of the reflection received an extra 6/12 with grade 00.
Another oil cup is shown in the eighth image of the gallery. Here the arcs of the large cog wheel and the rotor of the dynamo nicely draw the eye towards the oiler. Surprisingly, this negative was easy to print as the version shown in the gallery did not receive any dodging or burning.
Printing-wise the last image Window & Dynamo was just the opposite. The negative shows nice structure of the art nouveau building seen through the window, which absolutely had to be brought out in the print. Particularly nice is the blur due to stained glass panes along the window’s edges and sash bars.
I had used the pre-flash technique occasionally, but not successfully. However, I recently installed a simple pre-flash device in my dark room. A long time ago I had built a small light box to preview negatives, when they were placed in the negative holder of my Focomat IIc enlarger. After I found the original light box, which is normally situated underneath the base board of the enlarger, the DIY one was spare. I installed it upside-down about one meter above the table where I cut and label my printing paper. I attached a little rail, so I could use the multigrade filters (7×7 cm) from my Durst 605 enlarger to change the color of the light. A no longer used mechanical timer now times the pre-flashing. A small test series gave me the times necessary to just create a first trace of gray in the print depending on the grade of the filter. At first the times were too short, but an extra layer of diffuser foil extended the threshold times, so now e.g. grade 00 needs 5 s to stay just below that threshold.

This 5 s at grade 00 was the pre-flashing used for this last image in the gallery. In addition, further burning was applied as shown in sketch below to bring out the scene behind the window and to adjust the foreground a little.
