Often it takes quite some effort to measure and judge the right exposure; light and shadow parts of the motive are measured with the spot meter and then the placement of the zones is decided, often down to about a third of an f-stop.
Then aperture and speed are set on the lens and the film is exposed. At that moment we usually trust the settings we have made and assume that the shutter does what it is supposed to. However, not seldom, the actual shutter speeds deviate from the nominal ones. Particularly, when older (preowned) lenses are used (like all of mine), the bias between nominal and actual times can be larger than the resolution of the light meter measurement, thus requiring a correction.
The shutters on older lenses are precision mechanical instruments and like mechanical clocks, they need maintenance and even more than clocks they undergo wear and tear after years of use. Even worse can be no use, because the lubricants become stiff and particularly the ‘long’ times (1/10 s to 1 s) take longer than they are supposed to.
When you look at the used lens market, you can often read things like “shutter works on all times correctly as judged by ear“, but how good can one estimate the shutter speed by listening? Better is measurement.
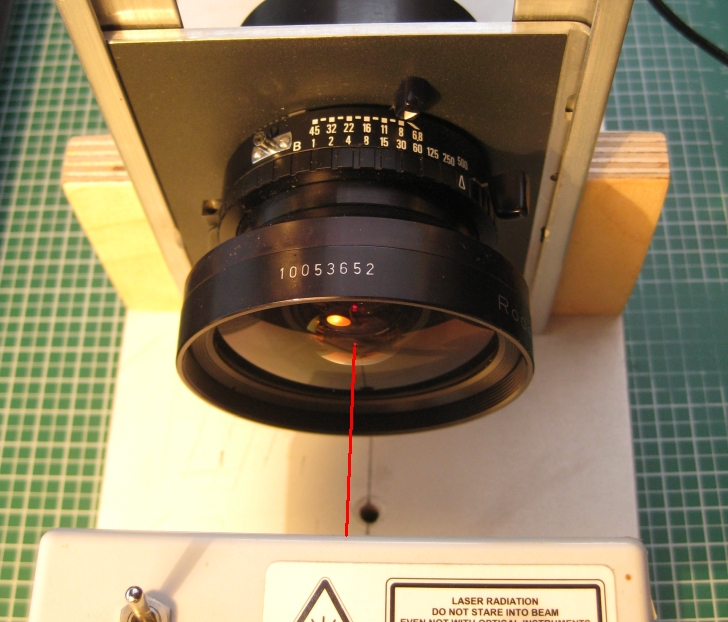
So it was time to test the shutter speeds of all my lenses. I built a simple device with a small red laser and a photo diode. Both are mounted in small boxes the height of which can be adjusted to the size of the lens, which is placed between the boxes with the lens board of my Plaubel PL69D fitting in two aluminum rails.
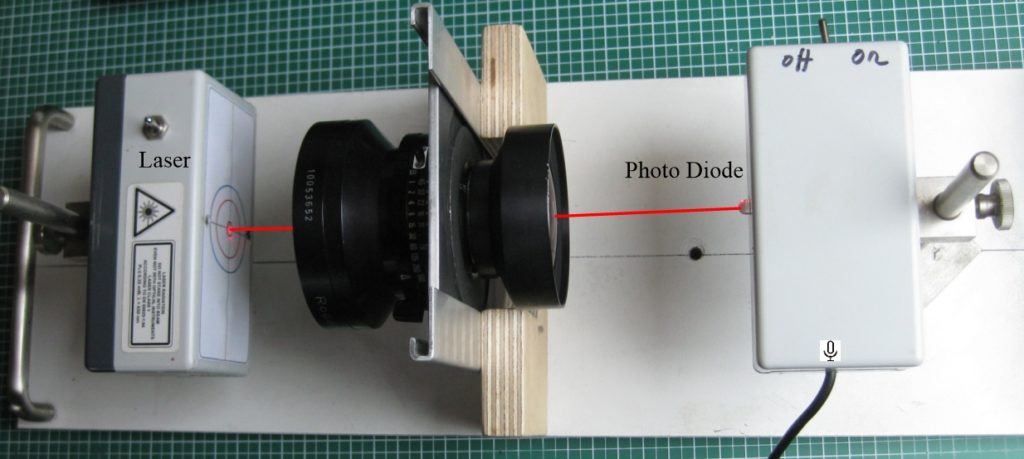
The signal from the photo diode is fed via the microphone connector to a PC and a free audio software (Audacity) is used to measure the time between opening and closing of the shutter. A capacitor in the circuit of the diode produces a spike at the opening of the shutter and its closing. With the audio software, the interval between the two can be easily measures. I usually take ten measurements of each speed setting and read the interval in samples (not in seconds) which gives a better resolution. The sampling rate is 44,100 samples per second, so dividing the number of samples in the interval by 44.1 gives the time in milliseconds (ms).
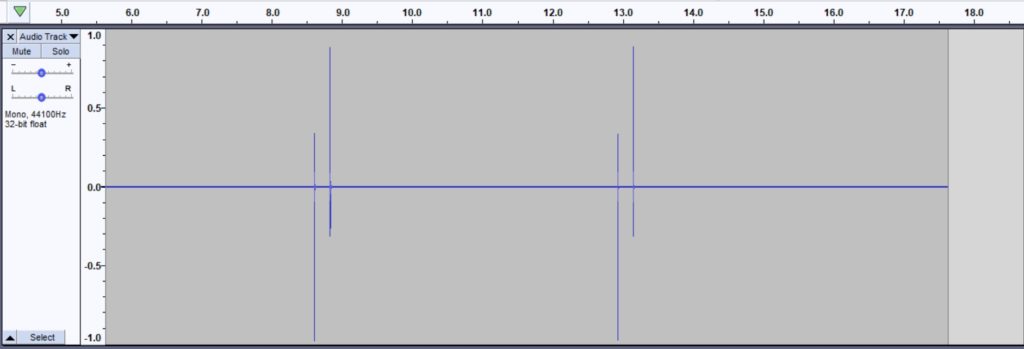
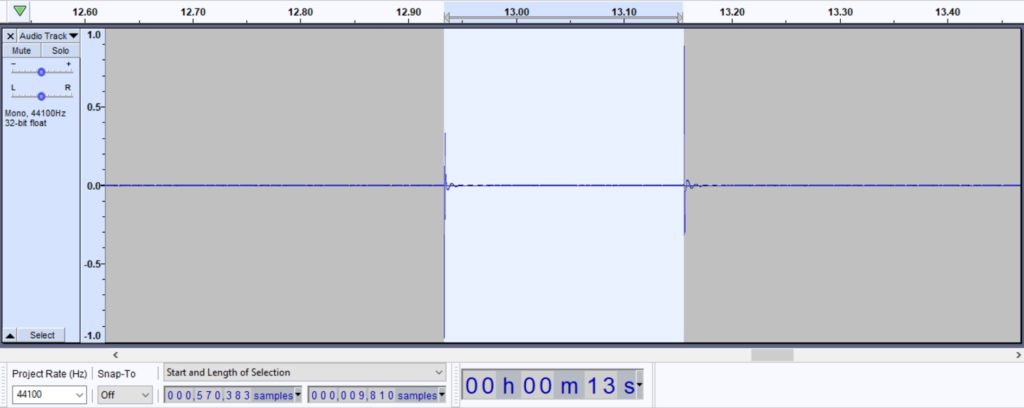
With ten measurements a little statistics is allowed ;-). The measured times are entered to a spread sheet (an example is shown below). The median and average of the measurements is calculated as well as the standard deviation. The latter is interesting, because it gives a measure of how consistent the times of each setting are. Even if the actual times deviate from the nominal ones, as long as this bias is consistent, it can be taken care of when exposing the film. In the spread sheet, Line 5 gives the setting, line 6 the desired opening time of the shutter in ms and lines 7 to 16 the measurements. Below the statistics and in line 23 is shown what what the actual time setting would have to be. E.g. for the nominal setting of 1/100 s the measurement resulted in 1/57 s. As the times can not be corrected, the bias has to be compensated by the aperture. So in line 26 is given the f-stop correction which compensates the biased shutter speeds, which for the 1/100 example would require a closing of 0.8 f-stops, indicated by -0.8, because the shutter stays open 18 ms instead of 10 ms.
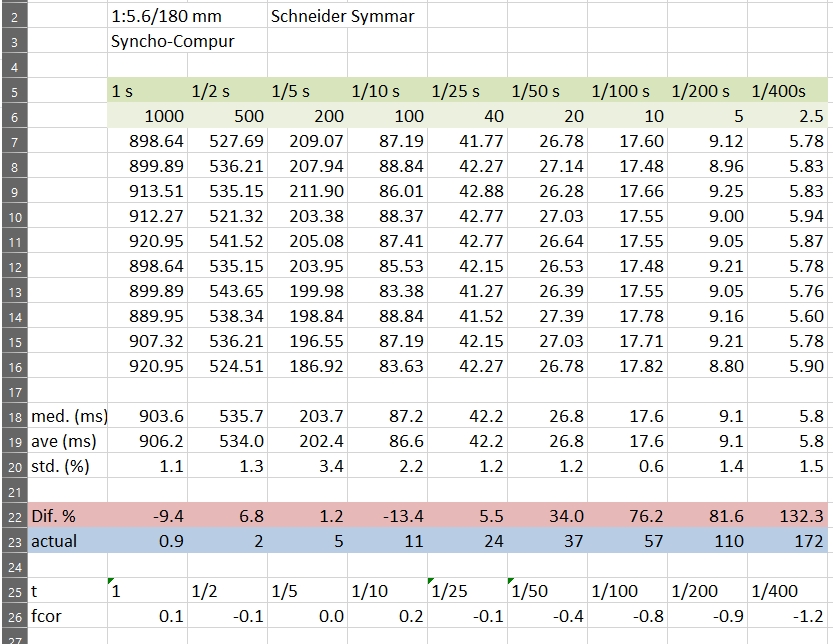
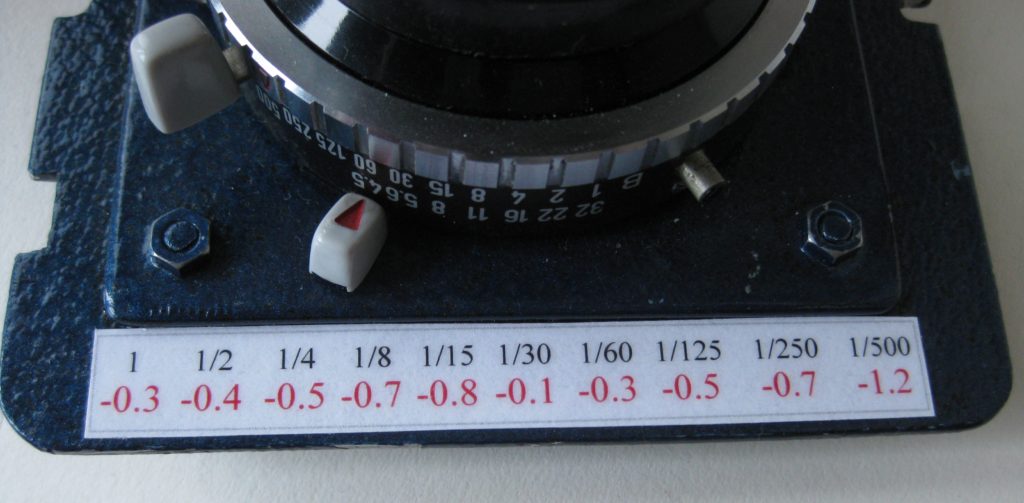
How to keep the corrections in mind, when you are in the field taking photos? I just used the values from lines 25 and 26 for small stickers on each lens board.
Checking all nine lenses (47 mm, 65 mm, 75 mm, 90 mm, 105 mm, 135 mm, 180 mm, 270 mm, and 360 mm) took 850 individual measurements, a good day of work. At the end I had the updated time corrections and all shutters had been fired sufficiently to keep them healthy.
For those interested in the spreadsheet, just sent me an E-mail via the contact page.