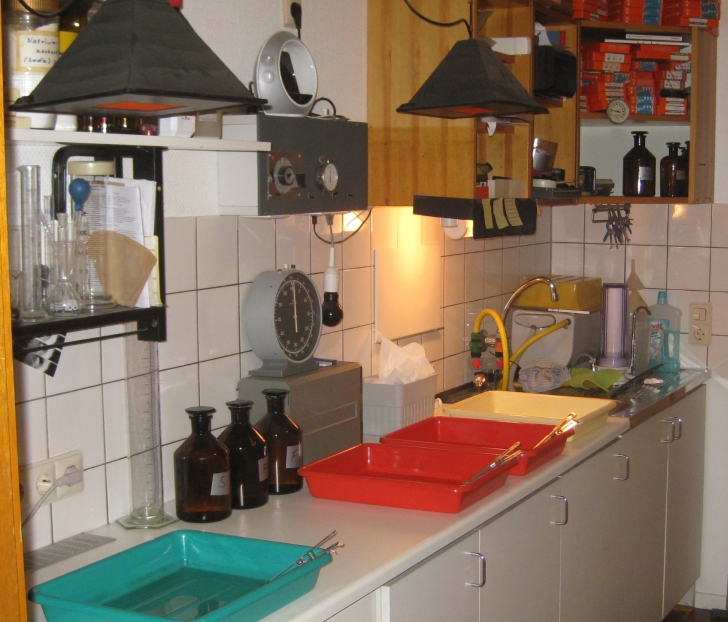
Over the years, I have developed a standard procedure when printing the black and white images. As standard material I use Ilford RC variable contrast paper, Amaloco AM6006 developer, X10 stopbath and X55 fixer. My standard paper size is 18×24 cm and 24×30 cm for selected images.
The negatives I am working with are stored in a glassine folders and hung up in front of an A4 size light box on the wall right next to the table with the enlarger. Negative size is either 6×9 from my Plaubel PL69 camera or 4.5×6 when I used the Mamiya 656. Underneath the light box is a small wooden shelf with two draws below it (from a former sewing machine). Here some useful tools are kept like pencils, a brush and a 8x magnifier for negative inspection. In the lower draw also a bunch of masks for burning are stored.
On top of the shelf is a device that I thought was rather expensive; however, it is worth every Euro I paid. It is a Kinetronix anti-static brush with build in ventilator and dust filter. Usually I open the negative carrier of the enlarger and clean the both surfaces of the upper (anti Newton) glass and the lower normal glass with an anti-static brush. Then I pull the negative, which is to be printed 4-5 times through the anti-static brush on the shelf and immediately put it into the carrier and close it. My frustration with dust on negatives has gone down significantly since I regularly use the anti-static brush.

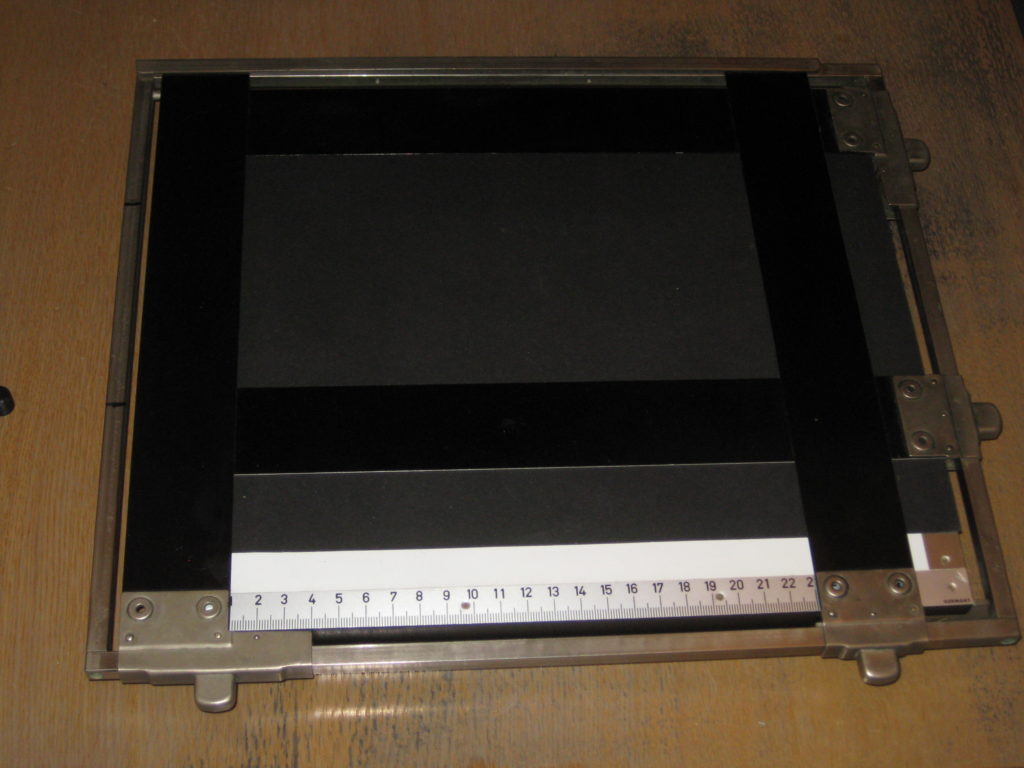
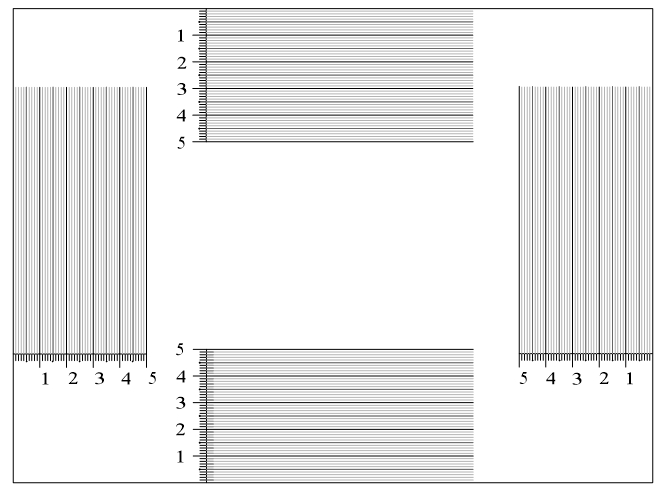
The standard easel is an old but very sturdy Leitz 18×24 instrument with four blades and a full metal base. The base has two grooves, which are compatible with the clamping mechanism of the Leitz Focomat IIC. The size of the projected image is adjusted and the outline fine-tuned with the blades. Very helpful is a simple chart printed on white paper and laminated that allows the frame width on all four sides to be set and measured separately. From time to time I use a grain loupe to check the overall focus of the projected image. As long as no major changes are being made in the set up, the autofocus of the Focomat IIc can be trusted. When the frame is finally set, I use a small measuring tape that I have attached to the Focomat IIc at the height of the negative carrier to measure the distance between it and the top of the easel. This is recorded together with the chosen aperture of the enlarging lens, which is usually 8. When larger (or smaller) prints from the same negative are made, the new exposure time (t2) can easily be calculated with the old exposure time (t1) and the new (h2) and old (h1) distance between negative and easel:

Next step is the testing for an initial paper grade and exposing time. This is done with the help of a Analyser Pro of RH Designs, an instrument which I really like. It is fully tailored to me needs, respectively, I have adjusted my procedure to the capabilities of this instrument. First the deepest shadow (clear negative part) is measured with the light probe (sensitometer) of the Analyser Pro, next the brightest part of the image (darkest part of the negative). The instrument not only suggest a grade and exposure time to cover the tonal range of the negative, it also indicate the brightness of the measured points on a 16 step LED scale. In addition several further (midtone) points can be measured and their value in the print is indicated by corresponding LEDs. By changing the grade in ½ grade steps (corresponding to the grade filters I use) and the exposure time in f-stop fractions (from 1/12 to 1/2 of an f-stop) you can adjust the settings until the lighted LEDs indicate the tonal range which you have planned for the print. This sound much more complicated than it is and after a few printing session it become routine. When the combination of grade and exposure time has been decided on, the next step is test stripes.

I was used to take a piece of photographic paper, place it on the easel and expose it first for a certain time and then cover/uncover sections of the paper with additional exposure, thus producing a series of stripes with increasing exposure time. Today I much more like to test print several times (exactly seven times) the same part of the image onto a piece of paper. This might take a little longer, particularly with long exposure times, because each stripe receives the full time and not on step-wise in increase. But a big advantage is that the image on the stripe is always the same and the comparison is much more direct. A second point, which might only be my imagination, but I feel that the full exposure time in one run produces slightly different results, that the step-wise buildup of the full exposure time. The stripe printing became very easy since I built a test stripe printer following the description in “Way Beyond Monochrome”.
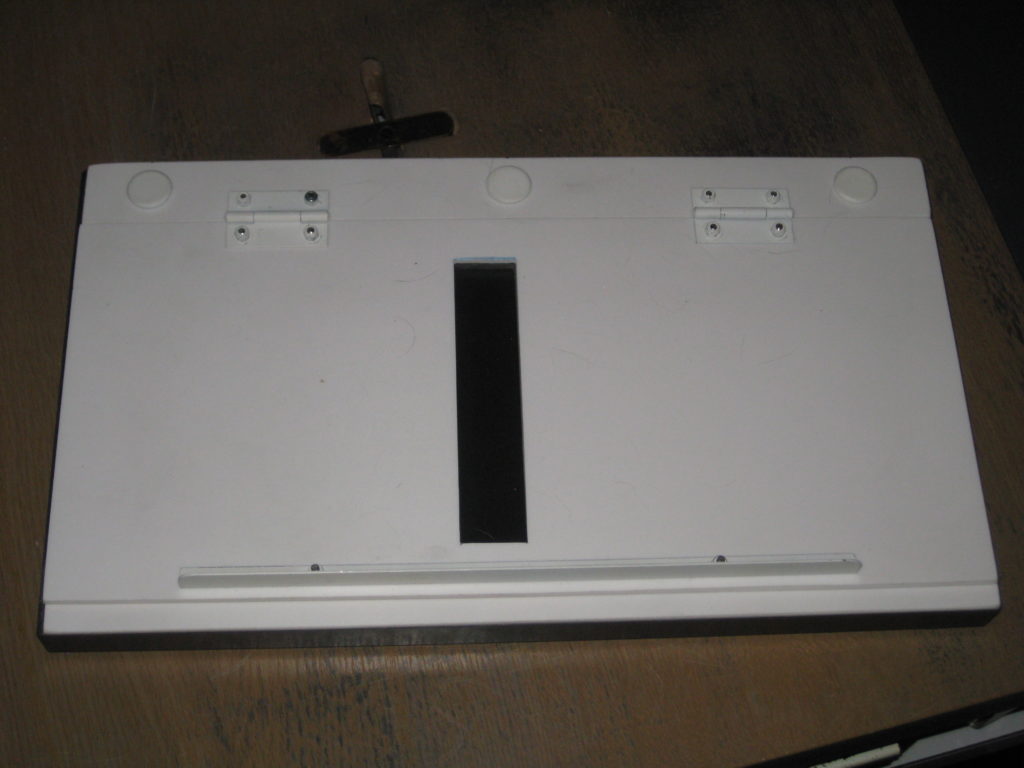
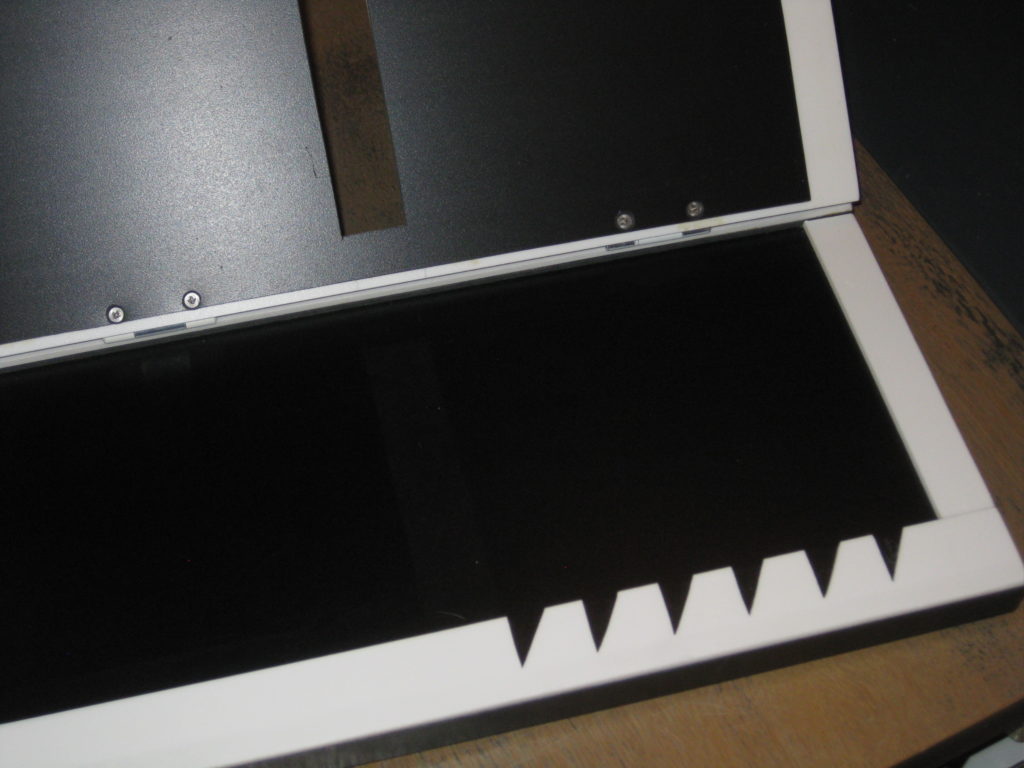
Now comes in the big advantage of f-stop printing. The easel is exchanges with the test stripe printer the window of which is placed so it covers important sections of the image. The filter for the selected grade is placed in the filter draw of Focomat above the negative. Then the exposure time is reduced by three steps. The steps can be any of the above mentioned fractions of 1/12 to 1/2 of an f-stop. Usually my (first) test step is 4/12 or 1/3 of an f-stop. The instrument displays this a 3x(-3), so -9. A full 18×24 cm piece of paper is cut in half and the negative number, the grade, the central exposure time and the step-width is recorded on its back with a soft pencil. Then it is placed in the test stripe printer for the first exposure. The time is increased by one step (here to -6 in the example) the test paper moved for one slot and exposed. This is repeated until the exposure is at +9.
The test stripe then experiences my standard development, 1 ½ Minutes development, 30 s stop bath, 1 Minute in ‘old’ fixer and 1 Minute in fresh fixer, and a quick rinse. Under white light of a 15 W bulb, the test stripe is inspected to select the stripe with the best fitting distribution of tonal values. If necessary, a second test can be made with the chosen exposure time as the center and smaller steps than before (e.g. 1/12) to fine-tune. However, with some experience it is also possible to judge in between the 1/3 steps and thus decide on the exposure time for the first print. The testing board is exchanged with the easel, which is adjusted to the previously decided position and then clamped with the mechanism of the Focomat IIc. This is very handy, as no accidental movements of the easel can occur during the following operations. A full paper is taken from the paper safe (a light tight drawer I built underneath the table with the enlarger), negative number and exposure settings and an ‘S’ is marked on the back, the latter indicating that it is a straight print without any dodging or burning. The same is then noted in my record book. The print is exposed, and developed following the above-mentioned standard.
The first straight test print (P1) is evaluated under white light and then I decide on any change of exposure time and dodging and/or burning. I know that a sorrow drying is necessary before the final appearance of an image can be judged, and over the years some experience allows to estimate that dry down change which is usually in the range of 1/3 f-stop maximum. Then the laborious dodging and burning procedure starts, mostly with two to four more attempts before achieving the desired result.